
Once, your micro SD card is ready with an OS in it, the next step is to connect devices (like monitor, keyboard, mouse, power adapter, etc) with your Raspberry Pi and the first power-up after OS finally gets installed and your Raspberry Pi boots up.
You can connect the keyboard, mouse, monitor screen, Ethernet cable and also insert the SD card into the SD card slot. It is recommended to connect all the peripherals before powering up the raspberry pi. All these peripherals are optional according to the usage of the user.
The Power Supply of 5 volts 3 Amps and a micro SD card (minimum 4 GB for Raspbian lite and 8 GB for desktop) is mandatory to start the Raspberry Pi.
In this blog, we are going to connect Raspberry Pi 4 with its peripheral devices. Let’s get started.
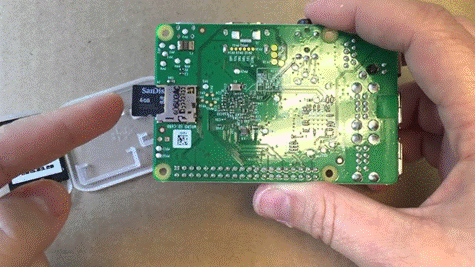
Micro SD Card:
Check here INSTALLATION OF OPERATING SYSTEM IN RASPBERRY PI
After booting your micro SD card with the operating system, insert the micro SD card into the SD card slot which is on the back of the Raspberry pi board.
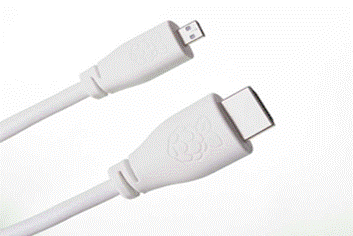
Micro HDMI to HDMI cable:
Add on feature which makes Raspberry Pi 4 different from other models is that it has two slots to connect two screens/desktops. Both slots use micro HDMI to HDMI cable.
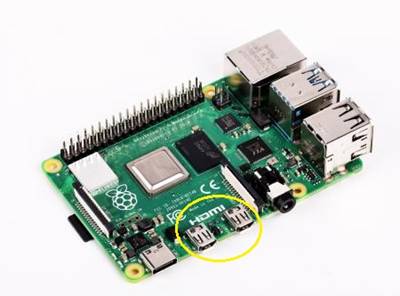
HDMI display:
A PC display or any other monitor screens can be used to connect with the Raspberry Pi. It only needs to have HDMI port for the connection. You can connect two screens at once. Raspberry Pi support 4K video output which can be configured in the Raspberry Pi Configuration.
Keyboard:
The keyboard is an input device as it only sends data to a computer and does not receive any information back.

Raspberry pi 4 has a USB port on its board where you can connect your USB cable of the keyboard. All the keyboard types are supported by Raspberry Pi. You can Configure the Keyboard options in the Raspberry Pi Configuration.
Mouse:
A mouse is also an input pointing device.
Connect a USB wired or wireless mouse to one of the USB sockets on the Raspberry Pi. It is plug_and_play; you don’t need to configure anything for the mouse as it is with your desktop.
Note: Try to keep the USB 3.0 (blue) port for the flash drive.
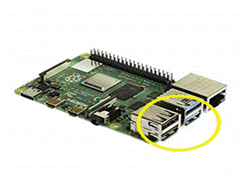
Ethernet cable:
Just like a PC/laptop, Raspberry Pi also has the feature to connect to the network using an Ethernet cable.
There is an Ethernet port highlighted in the image, where you can insert an Ethernet cable and give Pi the access of internet.
Wi-Fi can also be used but for that, you need to add your SSID and password settings.
For the first setup, you need to use an Ethernet cable if you want to connect it to VNC (for remote connection). Without Ethernet, you cannot get the IP of your Pi which is very essential when connecting over VNC.
Note: After connecting all the devices then only give power supply to the pi.
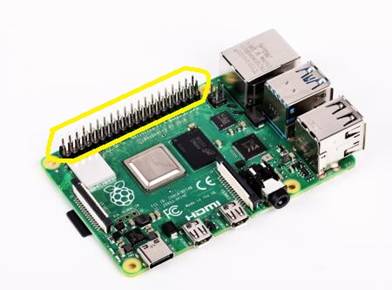
Headers:
One of the most important, as well as an interesting feature which Pi offers the user, is the GPIO pins(i.e general-purpose input-output pins). External devices such as Temperature sensor, IR sensor, Ultrasonic sensor, Relays etc can be interfaced with the Pi which is not possible in a personal computer.
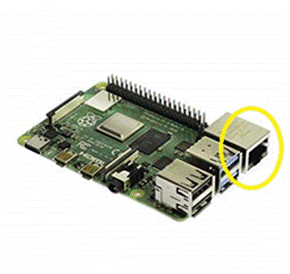
Type C power supply:
Once you are done with your connections plug in the power supply.
A 15.3W type C power supply is required for the Raspberry Pi 4. It provides stable 5.1V 3A power to the Pi. It has an input operating input voltage range of 96-264Vac.

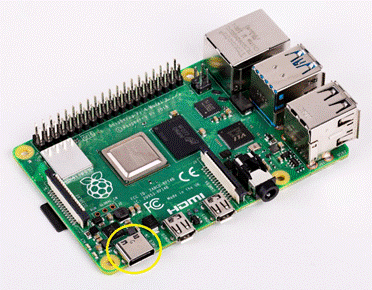
Insert your type C power supply into the type power slot highlighted in the above image. Once connected and powered you will see a red power led glowing. If your Raspberry Pi is booting you will also see a green LED blinking. For any power issue, the red LED will also blink.
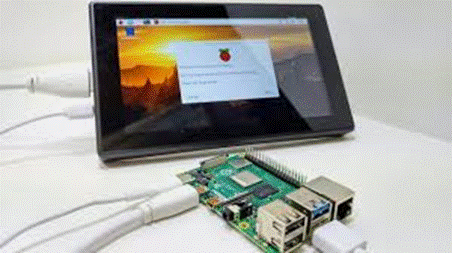
As soon as the Pi gets the power it gets ON as there is no external power button for the same and the booting process begins. After installation of the OS the desktop of the raspberry pi will appear.
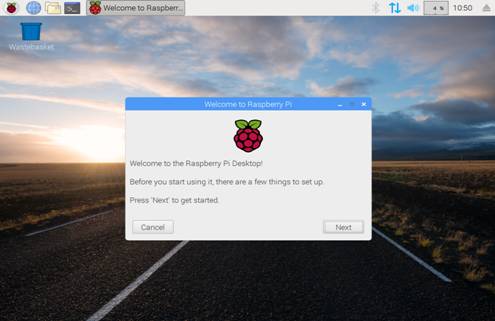
This is the desktop of the Raspberry Pi.
For the first time, it will ask you to set up a few things like setting the location, time etc. After all the settings are done, you are ready to use your Pi. It is the same as your normal PC the only difference is that it is based on Linux.
Conclusion:
Connecting Raspberry Pi with its peripherals is as easy as it is with other personal computers. With Raspberry Pi, we need to be more careful, as it is a single-board computer and everything is open.
Hope you enjoyed reading this article… Get free Raspberry Pi Training Book