

Facing connection issues can be quite infuriating, especially with how the internet and social media has become a huge part of our life. Not even a second without the internet can be justifiable.
Sadly, not everyone is equipped with the knowledge to solve even the simple networking problems and has to rely on professional help, which is both costly and time-consuming.
Here I have shown how you can troubleshoot most simple networking or connectivity issues on Windows 11 and 10. So read this article and equip yourself with the knowledge of self-troubleshooting.
Troubleshooting Simple Networking Issues On Windows 11/10
When you are facing connectivity issues, don’t always call for professional help as most issues can be fixed easily. Before you call for professional help, try the solutions provided here and see if it solves the issue.
Method 1: Power Cycle Your Router
One of the easiest yet most effective fix for any connection-related problems is power cycling the router. This deletes any corrupted cache and allows the router to cool down if it’s overheating. So, how to power cycle your router? Here is how you can do it:
- Turn off the router and unplug it from the power socket.
- Leave it for 5-10 minutes. Check if it has cooled down.
- If yes, plug in the power socket and restart the router.
Connect your device to the router and see if it solves the connectivity problem.
Method 2: Reboot Your PC
If you are facing connection issues on your PC, then one of the simplest and effective fix is to restart your system. Many overlook this simple solution, but it is highly effective in solving most minor issues.
Restart your device and once you boot into the desktop, check if the internet connection is fixed.
Method 3: Search It On The Internet
An easy way to self-troubleshoot errors or bugs on Windows 11 and 10 is by searching it on the internet. There are thousands of websites and forums dedicated to solving errors and bugs. There is bound to be someone who knows how to solve the issue you are facing on the internet.
DigiCruncher hosts hundreds of articles of solution guides for various issues, including networking problems.
Method 4: Change The DNS
Many common connectivity issues can be prevented by changing the DNS server. DNS is basically like a phone book that has the information of all the websites on the internet and your device has to go to it each time to find the location of the website.
You can change the DNS on Windows 11 and 10 by following these steps:
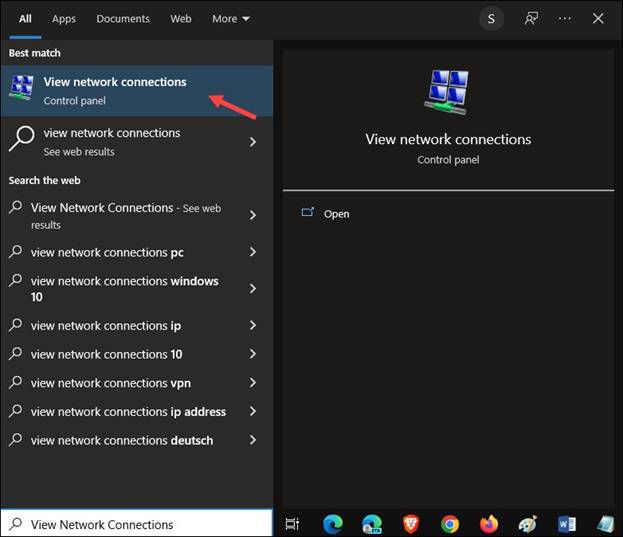
- Type View Network Connections in the Windows search bar. Click on the top option.
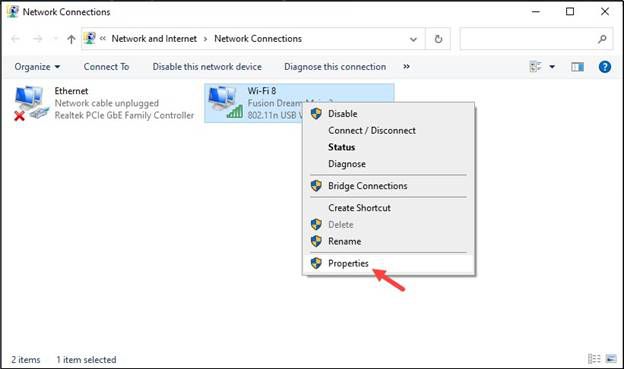
- Now, right-click on the Network adapter you are using and select Properties.
- Double-click on the Internet Protocol Version 4 (TCP/IPv4) option.
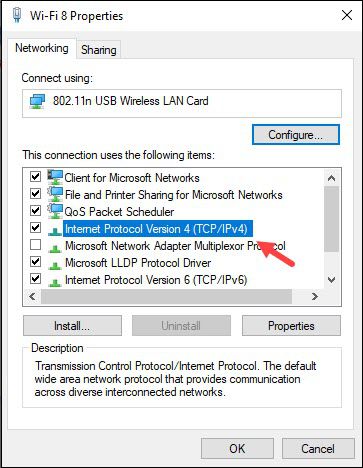
- Select Use the following DNS server addresses option.
- Set 8.8.8.8 as the Preferred DNS server and 8.8.4.4 as the Alternate DNS server.
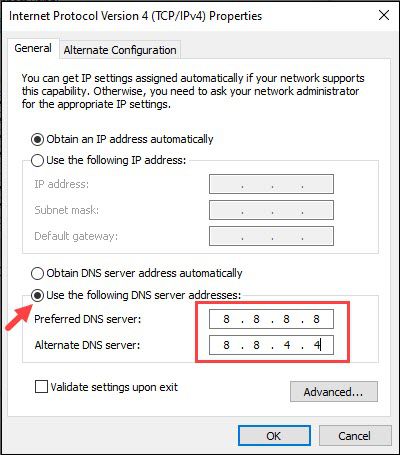
- Click on OK to save the changes.
Method 5: Running Network Troubleshooter
Windows 10 and 11 come with in-built troubleshooters to help users solve issues. Not many users know about these and they can help you solve many issues. Here is how you can run them:
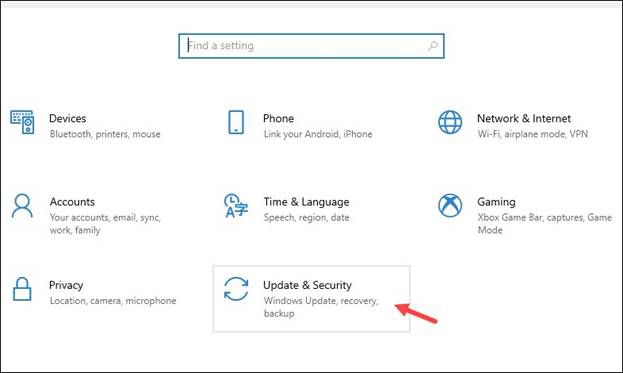
- Press the Windows + I keys to open Settings.
- Click on Update & Security option.
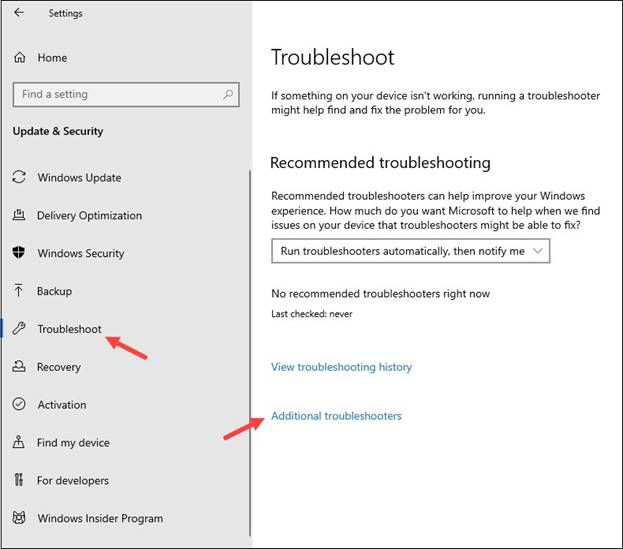
- Select Troubleshoot from the left panel.
- Click on the Additional troubleshooters option from the right panel.
Here you will find all the 17 available troubleshooters. Try running the Internet Connections troubleshooter. Click on it and select Run the troubleshooter. Follow the on-screen instructions and apply the fix as recommended.
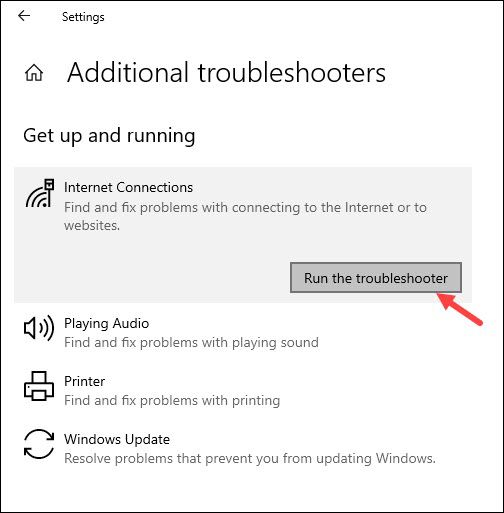
You can also try running the Network Adapter troubleshooter and Incoming Connections troubleshooter.
Method 6: Flush DNS
Many connectivity issues can be fixed by simply flushing the DNS. Flushing the DNS clears the DNS cache. To flush DNS, you will have to run a command line. Running command lines is simple and you have nothing to be afraid of as long as follow the steps I have provided.
Here is how you can flush DNS on Windows 10 and 11:
- Type Command Prompt on the Windows search bar.
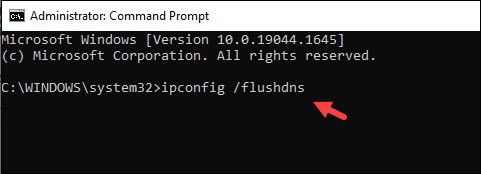
- Right-click on the top result and select the Run as administrator option. This will open the Command Prompt, which might look scary if you are not familiar with it, but don’t worry and simply keep following.

- Type ipconfig /flushdnsin the Command Prompt and press Enter to run it.
Wait for the scan to finish and restart your PC. After your PC restarts, check if the issue has been solved.
Method 7: Try Resetting Winsock
Another easy way to fix networking issues is resetting Winsock. This will undo configurations made to the Windows Winsock catalog. Resetting Winsock also requires running a command line and here is how you can do it:
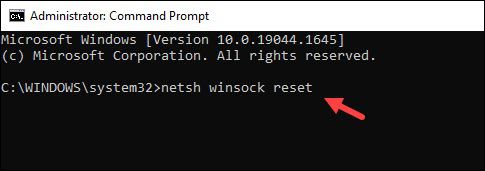
- Open the Command Prompt as administrator again.
- Type netshwinsock resetin the command prompt and press Enter. Wait for it to finish running.
- Restart your PC.
Wrapping Up
So, there you have it. Now you no longer need to worry when facing an internet connectivity issue. Simply follow the above methods and most minor issues should get fixed by it.