Have you ever thought of a world where asking the Internet for information feels like talking to a friend? Before we dive into the login process, let’s first understand what Chat GPT is. It is a state-of-the-art conversational AI model created for engaging in natural language conversations. It understands and produces human-like text with the help of deep learning techniques which makes it useful for many applications.
What is Chat GPT?
Chat GPT (Generative Pre-trained Transformer) is an artificial intelligence model that can understand and generate text-based conversations on its own. This model has been trained with large datasets so it can imitate responses from humans on various topics.
Key Features of Chat GPT
- Natural Language Understanding: ChatGPT is able to understand human language and respond to your corresponding text.
- Contextual Responses: Based on the context, it gives coherent and meaningful replies during interactions.
- Customization: For specific tasks or domains, users are allowed to fine-tune the base model which increases relevance and accuracy according to individual requirements.
Create Your Chat GPT Account
First step for unlocking its potential is creating your Chat GPT account.
Discover the Sign-Up Page
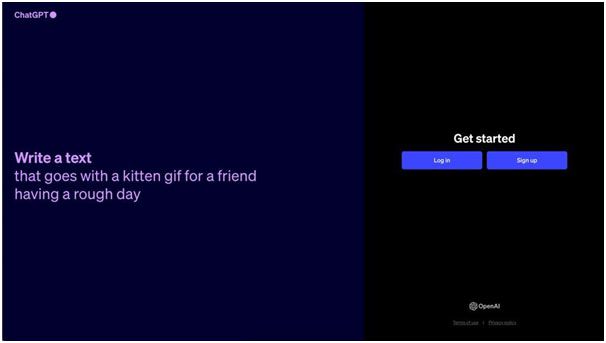
The thing you need to do first is find the ‘Sign-Up’ option on the front page of the official website of Chat GPT. Another way to do this would be going straight to the sign-up page by following a link.
Enter Your Credentials
When you get to the sign-up page, fill in your email address, desired username and secure password. Make sure all information is correct because otherwise there might be problems with logging in later.
Confirmation and Verification
Once you have entered everything click submit then verify your email address by clicking on the confirmation link sent to it. The main point behind this verification process is ensuring that nobody else can use your account but yourself. After successful confirmation, feel free to start using your new Chat GPT account.
Logging In to Chat GPT
Once you’ve successfully created your account, let’s proceed to login and see what Chat GPT can do.
Access the Login Page
To access the login page, go back to the Chat GPT website. You’ll usually find a “Login” option located near or next to the sign-up feature – it should be in the header or navigation menu of the site.
Inputting Your Credentials
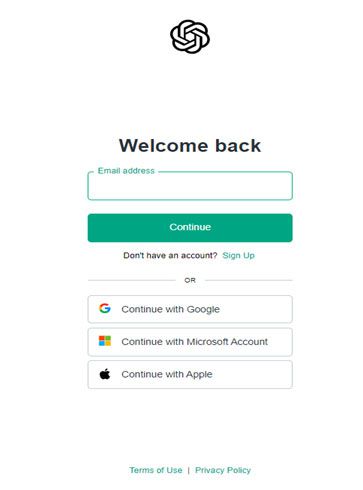
In their respective fields, input the email address and password that you used when signing up for Chat GPT. Make sure not to have any typos or mistakes so that logging in goes smoothly.
The Verification Process
Chat GPT might ask for more proof that it’s really you who is trying to log into this account (this is just an extra step they take towards ensuring account safety).
Exploration the Chat GPT’s Interface
At first, when you sign in, you will see that it is not difficult to use Chat GPT. The interface is very intuitive and has been designed for easy navigation with seamless interaction in mind.
Overview of the Dashboard
Think of the dashboard as your home base. It shows recent conversations, allows customization, and gives access to different features. Take a moment to look at how it’s laid out and what each part does.
Tools for Navigation
There are tabs in the navigation menu for starting new conversations, accessing settings, and more. They make it simple to move around within Chat GPT so you can get things done quickly.
Ways of Customization
You could go into customizing settings which will allow Chat GPT to behave based on what suits you best. You have control over things like language style or tone or even response length among others; this way every interaction can be made unique just for you.
Chat GPT Login: A Beginner’s Tutorial
Below are easy-to-follow steps specifically designed for beginners who want a hassle-free login procedure.
Step 1: Access the Chat GPT Website
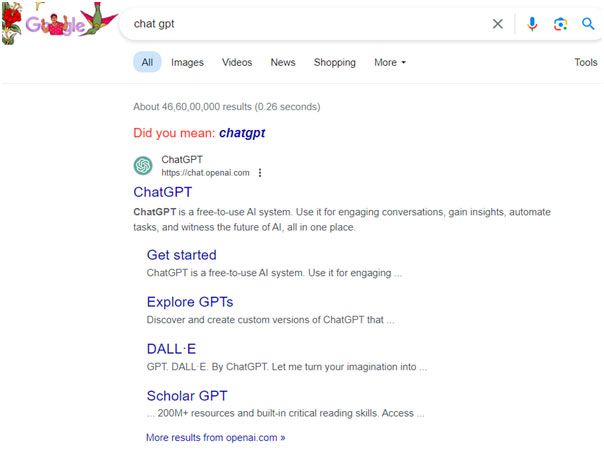
To begin with, open your preferred web browser then type in or search for chat.openai.com into its URL bar.

Step 2: Finding Where to Log In
Go to the front page and look up at the header or navigation bar. Find the word “Login” in big letters, usually on the right-hand side of a row of words. Click on it.

Step 3: Your Credentials
Once you are on the login screen, type your email address and password into the boxes provided. Double-check that you’ve entered everything correctly so that there are no problems logging in.

Step 4: Authentication Process
Sometimes websites want to make sure nobody else is trying to get into your account. If they ask for more information to prove it’s really you, just do what they say. They might send a code to your phone or email that you have to type in.
Step 5: Get Started!
Once you’re logged in, Chatbot GPT will send you its usual greeting – “Hello human!” or something like that – and show some buttons for stuff you can do. This is called your “dashboard.” There should be buttons for starting new conversations and things like that. The main page also shows different modules with settings and options so feel free to take a look around.
Conclusion
The Chatbot GPT login process can seem tricky at first but once mastered opens up endless opportunities for natural language interaction and text generation through artificial intelligence technology. By following this complete guide, beginners will find navigating through sign-in procedures easy thus kicking off transformative conversations powered by Chatbot GPT. Enjoy AI-driven communication today with the help of digital marketing agency expertise!

Namaste UI collaborates closely with clients to develop tailored guest posting strategies that align with their unique goals and target audiences. Their commitment to delivering high-quality, niche-specific content ensures that each guest post not only meets but exceeds the expectations of both clients and the hosting platforms. Connect with us on social media for the latest updates on guest posting trends, outreach strategies, and digital marketing tips. For any types of guest posting services, contact us on info[at]namasteui.com.

