Being a Typescript based open-source framework, Angular has support for several super heroic features. It has given Module Federation support with Webpack, an excellent solution for micro-frontend development, impeccable data binding feature, differential loading, etc. In this blog, we will learn something about Angular Data Binding.
Data binding is a basic concept in Angular 10 and earlier version that permits developers to make transmission between a component and its view or more accurately the DOM. Using this technique, you don’t require to manually push data from your component to the DOM and back.
Four Methods are there for Data Binding in Angular
Angular offers four types of Data Binding and they are basically different in the way data flows like from the component to the DOM, from the DOM to the component, or both ways:
- Interpolation: Data flows from the component to the DOM – It is used to display the value of component member variable in the corresponding template. We use curly braces for interpolation.
- Property Binding: Data flows from the component to an attribute of an element in the DOM. It is used to bind a component member variable to a property of a DOM similar to the value attribute of an <input> tag like in example <input type=” email” [value]=” email”>. We use brackets for property binding.
- Event Binding: Data flows from the DOM (Document Object Model) to the component. When a DOM event, as an example click, is triggered, the bound method from the component is called. For example: <button (click)=” sayHello()”>Hello</button> – The sayHello() method will be called so it requires to be defined in specified in the component class. We use round brackets for event binding.
- Two-way Data Binding: Data flows Equally. Like in example: <input type=”text” [(ngModel)] =” email”
Data Binding with Angular 10 Demo Example
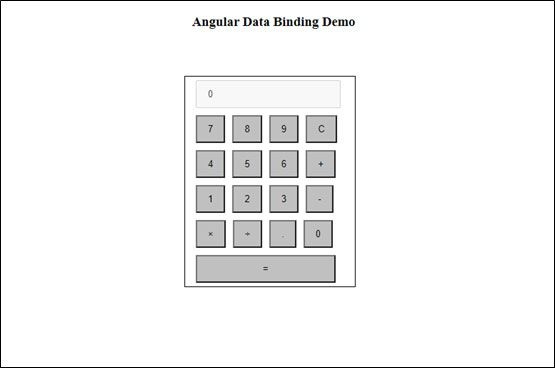
- Ready with this information, let’s perform our calculator application using an arithmetic operator.
- We have DOM (Document Object Model) elements for operations and numbers and were ever to display the result of the operations.
- We require to get the type of the execution or value of the number when the user clicks on the equivalent DOM element, calculate the result and display it in the results element.
In the template, we have four series of keys:
- Digits (0-9)
- Operators (+, -, *, /, =),
- A Decimal Point(.)
- Reset Key
- Let’s see how we can use Angular to listen for clicks on the calculator and specify what type of key was pressed.
- Open the src/app/ArithmaticOperatorDemo/arithmetic-operator demo.component.ts file and start by initializing the following member variable of the component.
export class ArithmaticOperatorDemoComponent implements OnInit {
resultInputNumber = ‘0’;
firstNumber = null;
arithmaticOperator = null;
holdForSecondNumber = false;
- The resultInputNumber variable held the string that will be displayed in the result input element.
- The firstNumber variable held the value of the first operand of the operation.
- The arithmaticOperator variable held the operation.
- The holdForSecondNumber variable held a Boolean value signifying if the user has completed typing the first operand and ready to enter the second operand of the operation.
Next, describe the getOperands () method that will be used to get the current number:
public getOperands(s: string) {
console.log(s);
if (this.holdForSecondNumber) {
this.resultInputNumber = s;
this.holdForSecondNumber = false;
} else {
this.resultInputNumber === ‘0’ ? this.resultInputNumber = s : this.resultInputNumber += s;
}
}
Next, describe the getDecimalOperands () method that will be used to get the current number:
getDecimalOperands() {
if (!this.resultInputNumber.includes(‘.’)) {
this.resultInputNumber += ‘.’;
}
}
Describe the doArithmaticOperations() method which performs the calculation according to the operator type:
private doArithmaticOperations(oprtr, secondOprtr) {
switch (oprtr) {
case ‘+’:
return this.firstNumber += secondOprtr;
case ‘-‘:
return this.firstNumber -= secondOprtr;
case ‘*’:
return this.firstNumber *= secondOprtr;
case ‘/’:
return this.firstNumber /= secondOprtr;
case ‘=’:
return secondOprtr;
}
}
Describe the getArithmaticOperations() that will be familiar with get the execution :
public getArithmaticOperation(oprtr: string) {
console.log(oprtr);
if (this.firstNumber == null) {
this.firstNumber = Number(this.resultInputNumber);
}
else if (this.arithmaticOperator) {
const result = this.doArithmaticOperations(this.arithmaticOperator, Number(this.resultInputNumber))
this.resultInputNumber = String(result);
this.firstNumber = result;
}
this.arithmaticOperator = oprtr;
this.holdForSecondNumber = true;
console.log(this.firstNumber);
}
Completely, describe the clearScr () method that will be used to clear the result area and reset the calculations:
public clearScr() {
this.resultInputNumber = ‘0’;
this.firstNumber = null;
this.arithmaticOperator = null;
this.holdForSecondNumber = false;
}
Now, you require to use data binding to binding these all methods to the template.
Angular 10 Property Binding by Demo Example
- We have described variables and methods in the component. Now, we will require to bind them to the template.
- Then, start with the resultInputNumber variable which held the value of the currently typed input number. Than use property binding to bind resultInputNumber to the value attribute of the <input> element as follows:
<div class=”calculator”>
<input type=”text” class=”calculator-screen” [value]=”resultInputNumber” disabled />
- We use Square brackets around the value to attribute and create a property binding.
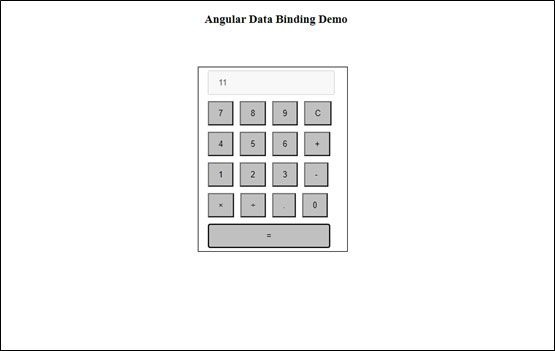
- Now, our result input number or current number will be displayed in our calculator, and whenever the value of the resultInputNumber variable changes, the displayed value will change consequently without holding manually, add any code to update the DOM.
Angular 10 Property Binding by Demo Example
- In the property binding, when a digit button is clicked we need to call the getOperands() method to append the digit to the current number string. For this, we can use Angular event binding to bind the getOperands () method to click event buttons for displaying the digits. Change your component template as follows:
<div class=”calculator”>
<input type=”text” class=”calculator-screen” [value]=”resultInputNumber” disabled />
<div class=”calculator-keys”>
<!– […] –>
<button type=”button” (click)=”getOperands(‘7’)” value=”7″>7</button>
<button type=”button” (click)=”getOperands(‘8’)” value=”8″>8</button>
<button type=”button” (click)=”getOperands(‘9’)” value=”9″>9</button>
<button type=”button” (click)=”clearScr()” class=”all-clear” value=”all-clear”>C</button>
<button type=”button” (click)=”getOperands(‘4’)” value=”4″>4</button>
<button type=”button” (click)=”getOperands(‘5’)” value=”5″>5</button>
<button type=”button” (click)=”getOperands(‘6’)” value=”6″>6</button>
<button type=”button” (click)=”getArithmaticOperation(‘+’)” class=”operator” value=”+”>+</button>
<button type=”button” (click)=”getOperands(‘1’)” value=”1″>1</button>
<button type=”button” (click)=”getOperands(‘2’)” value=”2″>2</button>
<button type=”button” (click)=”getOperands(‘3’)” value=”3″>3</button>
<button type=”button” id=”minus” (click)=”getArithmaticOperation(‘-‘)” class=”operator” value=”-“>-</button>
<div class=”calculator-keys”>
<button type=”button” (click)=”getArithmaticOperation(‘*’)” class=”operator” value=”*”>×</button>
<button type=”button” (click)=”getArithmaticOperation(‘/’)” class=”operator” value=”/”>÷</button>
<!– […] –>
<button type=”button” (click)=”getDecimalOperands()” class=”decimal” value=”.”>.</button>
<button type=”button” id=”zero” (click)=”getOperands(‘0’)” value=”0″>0</button>
<br>
<button type=”button” id=”btnResult” (click)=”getArithmaticOperation(‘=’)” class=”equal-sign”
value=”=”>=</button>
</div>
</div>
- We use the brackets or parentheses around the click event to create an event binding.
- We use the getArithmaticOperations(), getDecimalOperands and clearScr() function or method to click event occurrence of their own relevant buttons.
- That’s it now our calculator is ready with simple arithmetic operations.


Conclusion
We know that Angular plays a splendid role in Single-page application development.
Here, in this blog, we have successfully built the simple calculator application using Angular 10. We have learned about the types of data bindings with an example of event and property binding in Angular 10.

A Seasoned technocrat with years of experience building technical solutions for various industries using Microsoft technologies. Wish sharp understanding and technical acumen, have delivered hundreds of Web, Cloud, Desktop and Mobile solutions and is heading the technical department at AngularJS Frontend Development Company – iFour Technolab Pvt. Ltd.

