

In this tutorial you can get strong and good introduction to switch list grid view layouts of any HTML listing with jQuery.
A common web interface feature is dynamic view switcher and you’ll find sometimes buttons to change the layout of a web page from display lists to smaller grids.
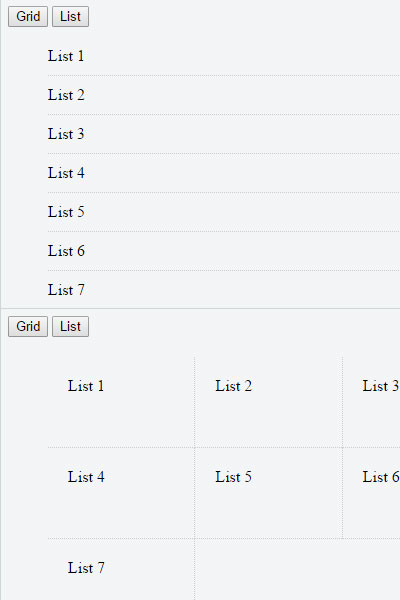
Let’s coding the basic HTML:
The HTML isn’t very complicated but contains a lot of repetitive code. Towards the top I have included two links with the classes list and grid.
<div id="box">
<div class="buttons">
<button class="grid">Grid</button>
<button class="list">List</button>
</div>

<ul class="list">
<li>List 1</li>
<li>List 2</li>
<li>List 3</li>
<li>List 4</li>
<li>List 5</li>
<li>List 6</li>
<li>List 7</li>
</ul>
</div>
We will bind a click event handler onto these two buttons i.e. list and grid later on.
Read Also: Add table row dynamically in jQuery
Looking at CSS Styles:
Using jQuery we can change it between grid and list, then apply css for each.
#box ul { list-style: none; }
#box .buttons { margin-bottom: 20px; }
#box .list li { width: 100%; border-bottom: 1px dotted #CCC; margin-bottom: 10px; padding-bottom: 10px; }
#box .grid li { float: left; width: 20%; height: 50px; border-right: 1px dotted #CCC; border-bottom: 1px dotted #CCC; padding: 20px; }
jQuery Switch Effects:
Let’s look at the opening bind method:
$('button').on('click',function(e) {
if ($(this).hasClass('grid')) {
$('#box ul').removeClass('list').addClass('grid');
}
else if($(this).hasClass('list')) {
$('#box ul').removeClass('grid').addClass('list');
}
});
See DEMO Online.
So, this article should give you a strong introduction for manipulating your page layouts with jQuery and developing with the jQuery library can make your code JavaScript easier than ever before!